Overview
Creating a public Contacts folder requires several actions within the Web Administration and through the email client being used, Webmail or Microsoft Outlook may be used for this purpose. This article covers the steps to create public folders for both email clients.
Folders created in Webmail are viewable in Outlook, and vice versa.
Solution
Assigning Public Folder administrative rights
- Log in to the Kerio Connect Web Administration Console with a user account that has read/write rights.
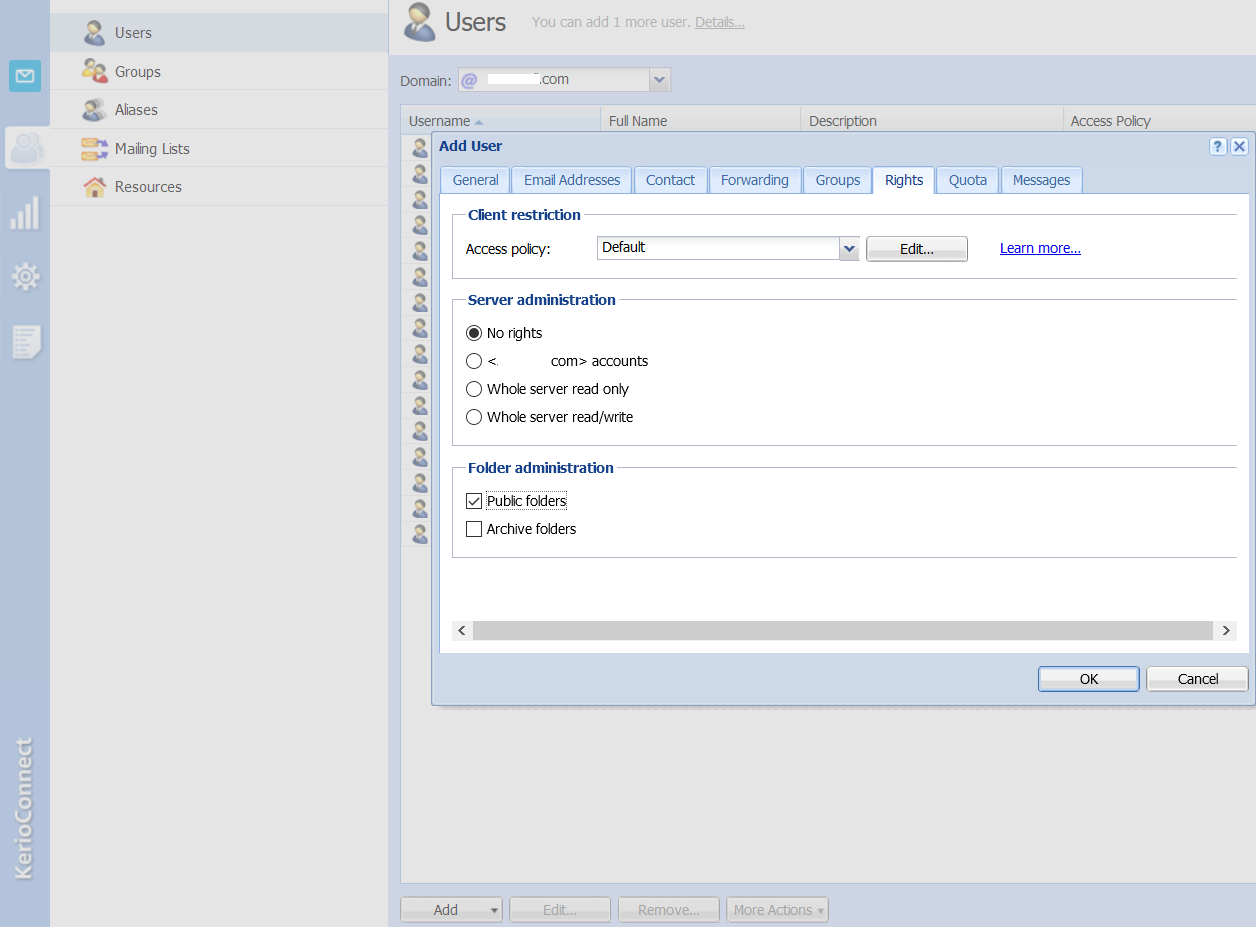
- Within the Web Administration Console, go to Users.
- Create a new user for public folder administration, or edit a pre-existing user.
- Click the Rights tab, check the Public folders option.
Creating and sharing public folders through Webmail
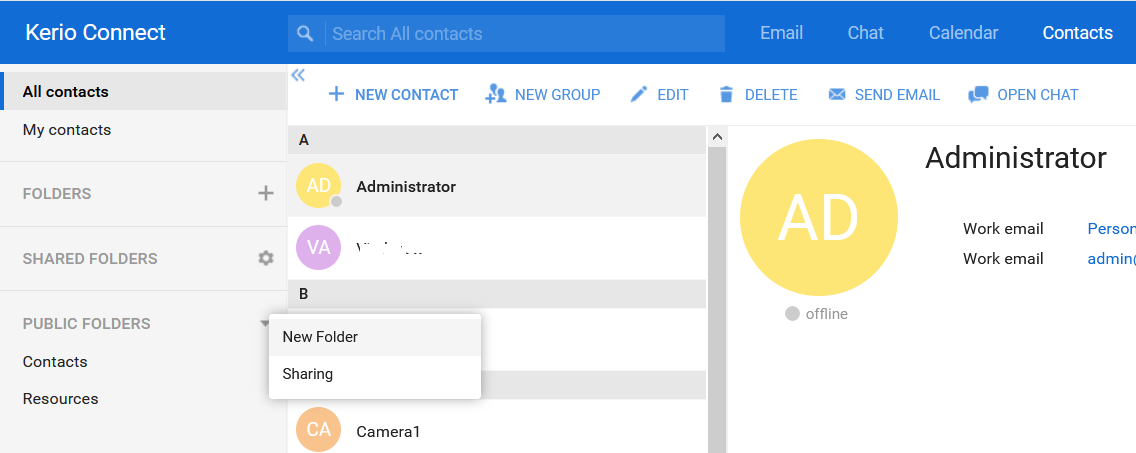
- Log in to Webmail with the Public Folder administrator user.
- Within Webmail's Contacts tab, click More on the Public Folders folder and choose New Folder.
- Create a new folder as Contacts type and supply an appropriate folder name.
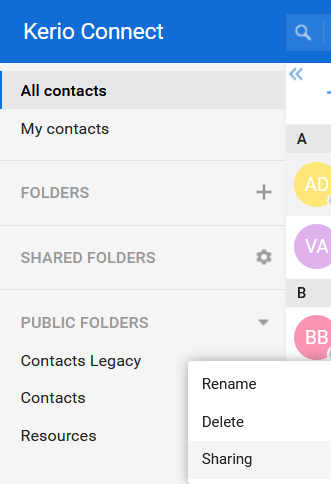
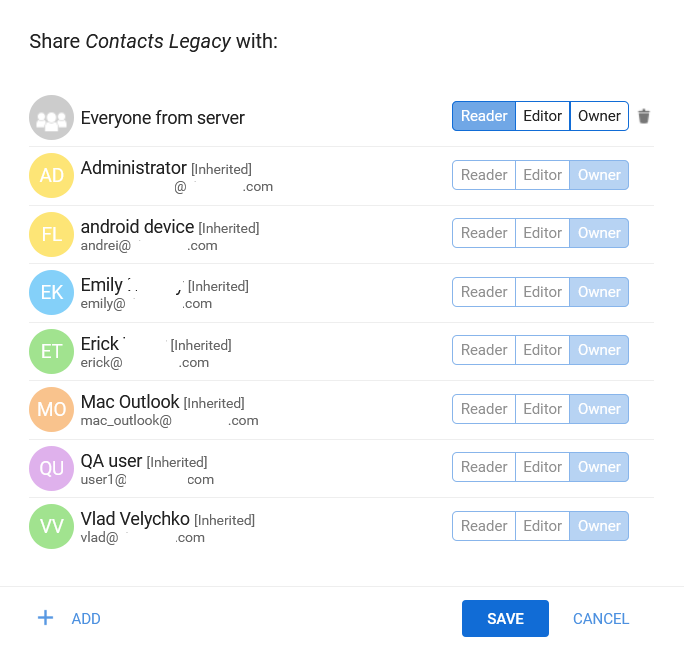
- By default, all users will be able to read this folder. To change permissions on the folder, right-click and choose Sharing.
- Choose the correct permissions. Please note, all users with Public Folders' rights will be set as Owners.
Creating and sharing public folders through Outlook with KOFF (Kerio Outlook Connector)
- Log in to Outlook (with the Kerio Outlook Connector) as the Public Folder administrator user.
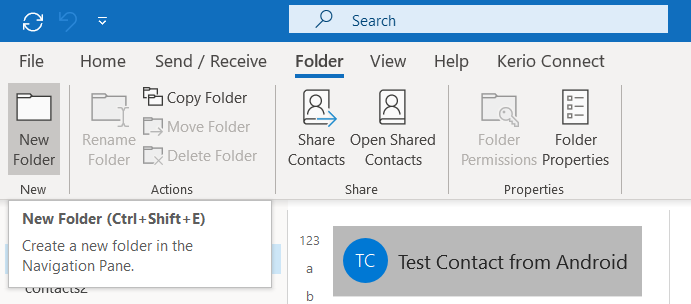
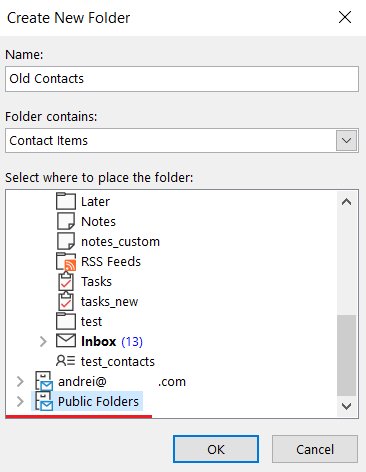
- Navigate to Folder tab -> click New Folder.
- Specify the Contacts' folder name and place it under the Public Folders section.
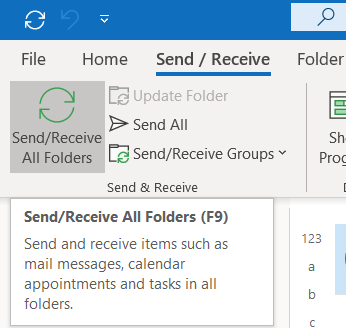
- Force the new folder synchronization to the Kerio Connect server by clicking Send/Receive All folders. Close the Outlook application.
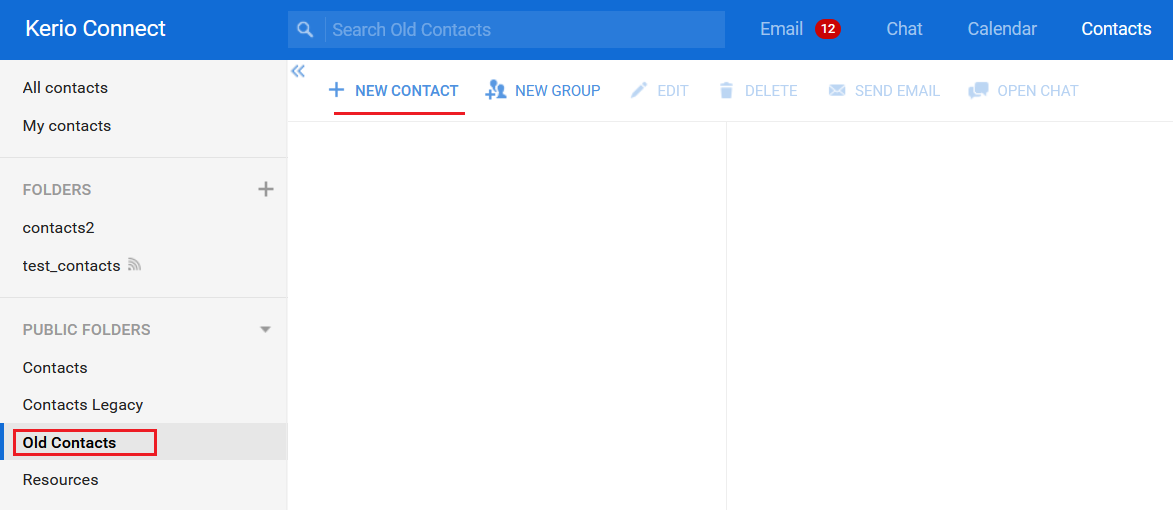
- Log in to Webmail and create a test contact under the newly created Contacts folder.
- Once created, login to Outlook and verify the folder and the contact visibility.
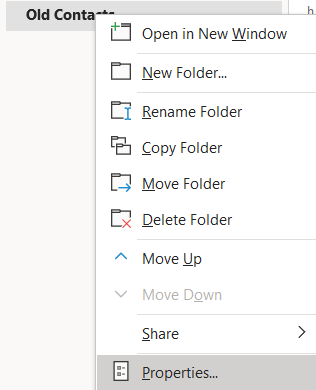
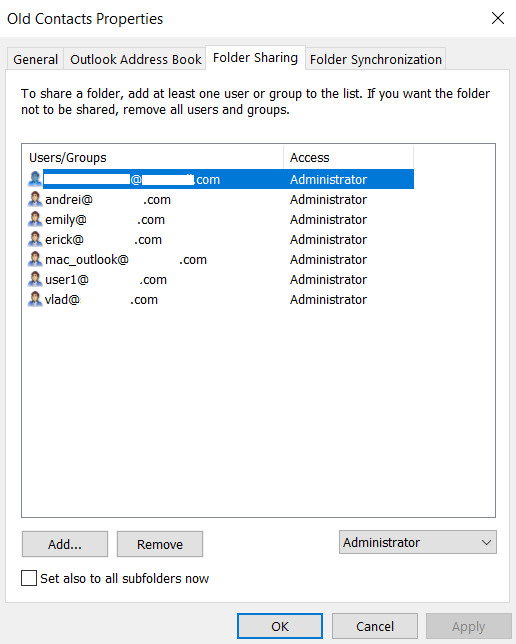
- To change permissions on the folder, right-click, choose Properties, and navigate to the Folder Sharing tab.
If you need to import local users into a public contact folder, use the Export feature in the Users section of the Web Administration Console.

NOTE: As mentioned in Syncing Outlook with Kerio Connect Using EAS Protocol, public contacts are not syncing over EAS (Exchange ActiveSync), as this is a limitation of the Outlook EAS protocol implementation.
Testing
The public contact folders are displayed on each email client.
Priyanka Bhotika
Comments