Overview
Filters are used to automatically sort messages into folders or forward them to another address. This article helps you to edit the rules of the custom filters or delete the filters which are no longer required in Kerio Connect Client or Webmail.
Solution
- Click a filter to display it.
- Double-click a filter to edit it.
- Click Save to save the changes.
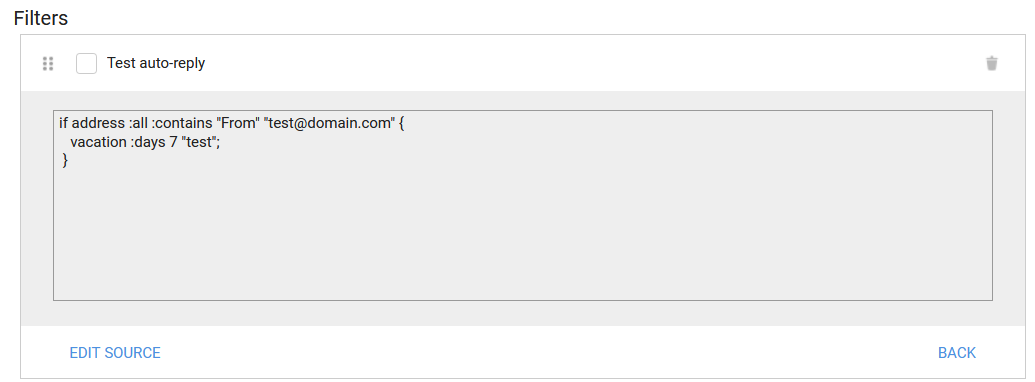
- Click View Source to view Sieve source code.
- You can also customize the script to your liking by clicking Edit source
- By doing this, you are able to tap into options not offered in the UI, thanks to the backend sieve scripting support; for example, you could configure your filter to deliver emails coming from a specific edge server to go into a subfolder in your Inbox, based on the value of the
receivedheader:if header :contains "received" "SRV1.local" {
fileinto "INBOX/Edge_server_1_mails";
} - Note that some headers may not be supported, and custom scripting is not in the Kerio support scope.
- To disable a filter temporarily, unselect the filter checkbox.
- To delete a filter, click the Trash icon next to the filter name.
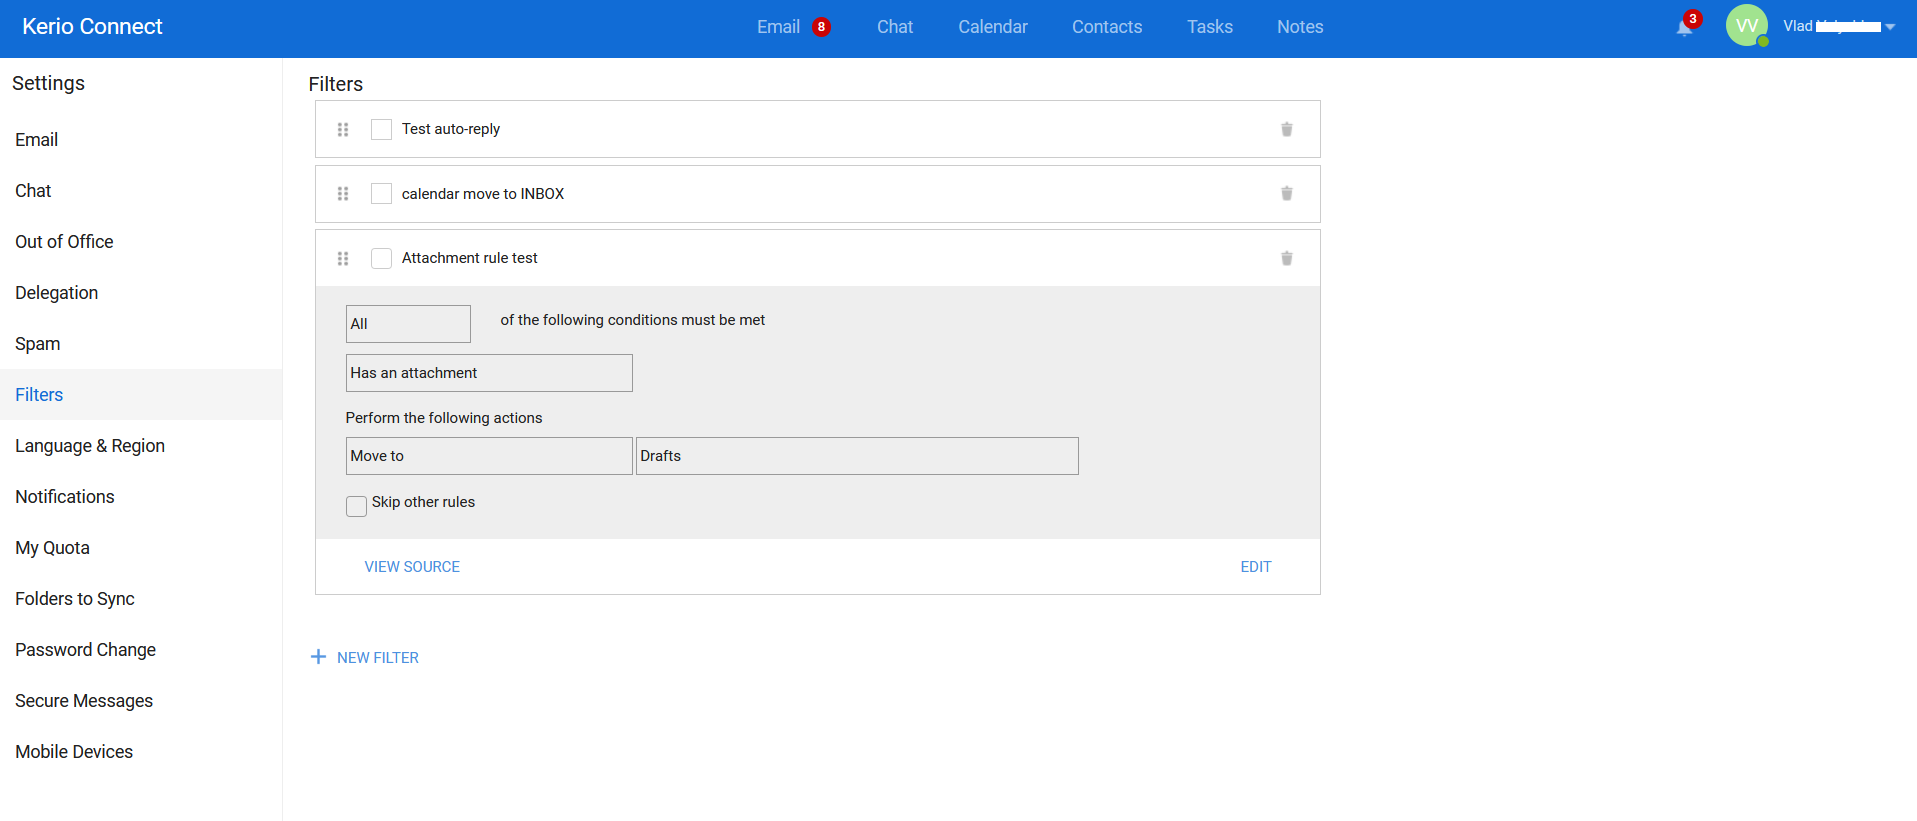


Note: For Kerio Connect Client 8.4 and older, hover your mouse over a rule and click the edit or delete icon.
Confirmation
Check if the edited filters are functioning correctly and the deleted filters are not being displayed in the filters list.
Priyanka Bhotika
Comments