Overview
This article explains the process for synchronizing IMAP (Internet Message Access Protocol), CalDAV, and CardDAV accounts on iOS devices with the Kerio Connect account.
-
IMAP (Internet Message Access Protocol) is a standard email protocol that stores email messages on a mail server.
-
CalDAV is an Internet standard allowing a client to access scheduling information on a remote server.
-
CardDAV is an address book client/server protocol designed to allow users to access and share contact data on a server.
Process

In (at least) some iOS 14 versions, the profile downloads; however, the personal certificate is not imported and cannot be imported manually later on either. Therefore, if you are using either iOS 14 or iOS 15, it is recommended to configure the profile "manually" if you wish to encrypt and sign your emails.
ℹ️ The most recent versions of iOS no longer have this limitation, and as tested on iOS 18.4, Integrating EAS Accounts with Kerio Connect on iOS Devices will bundle the SMIME certificates
For other versions:
-
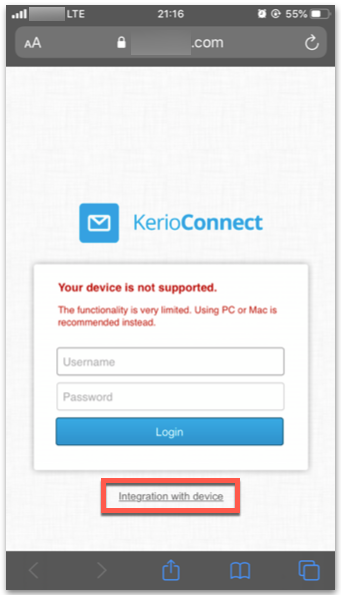
In your Safari browser, enter the URL address of Kerio Connect server.
-
Tap the Integration with device button.
-
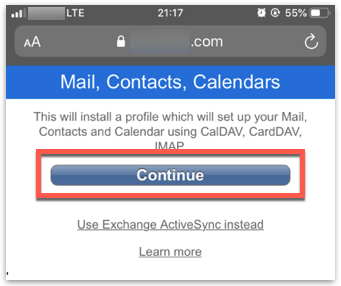
Tap Mail, Contacts, Calendars.
-
Tap Continue.
-
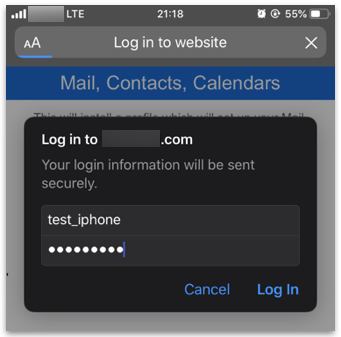
Enter your Username and Password. Tap on Log In.
-
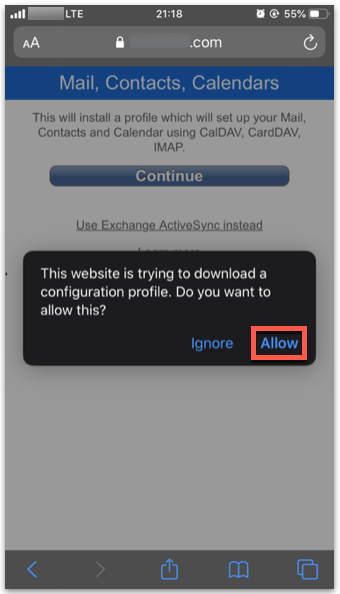
Tap Allow on the following message prompt: "This website is trying to download a configuration profile. Do you want to allow this?"
-
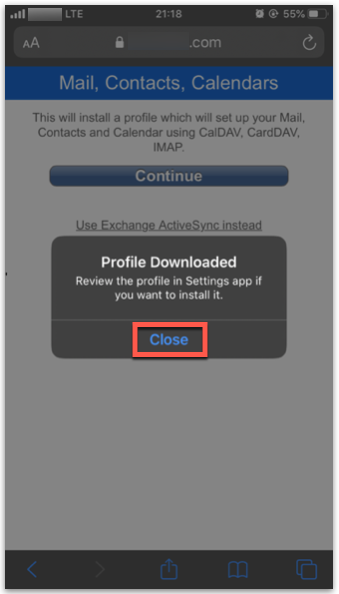
Once you see the "Profile Downloaded. Review the profile in Settings app if you want to install it." prompt, tap Close.
-
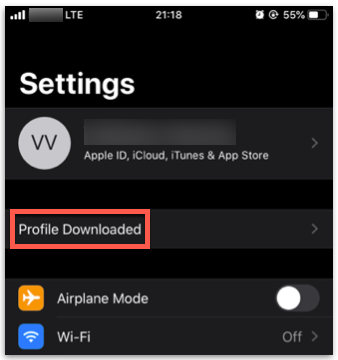
Open Settings and tap on Profile Downloaded.
-
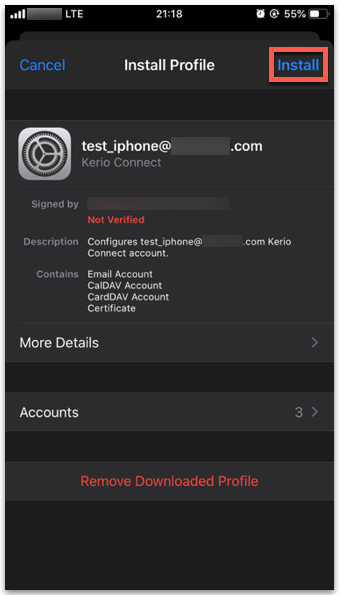
Tap Install at the top right corner of the Install Profile page. You might be asked to enter your iPhone password.
-
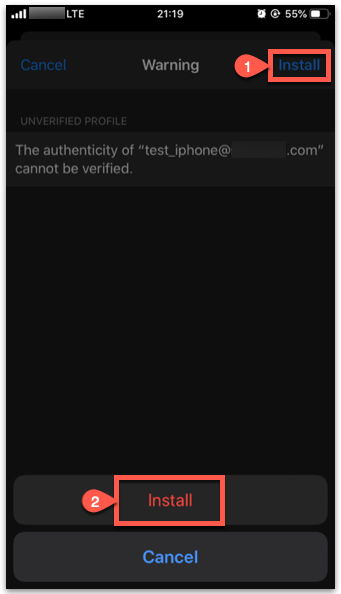
Tap Install on the warning page and tap Install at the bottom to confirm the installation.
-
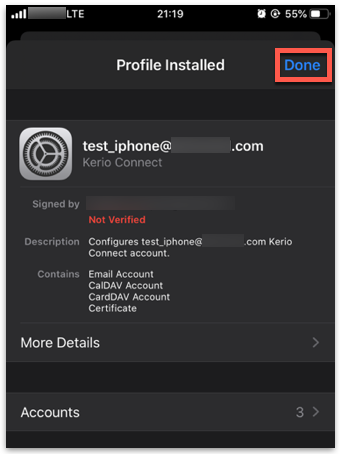
Once the Profile Installed screen is displayed, tap Done.
-
Contact administrators to ensure that the following ports on your firewall are allowed:
Protocol TCP Ports CalDAV or CardDAV 80/443IMAP 143/993

Confirmation
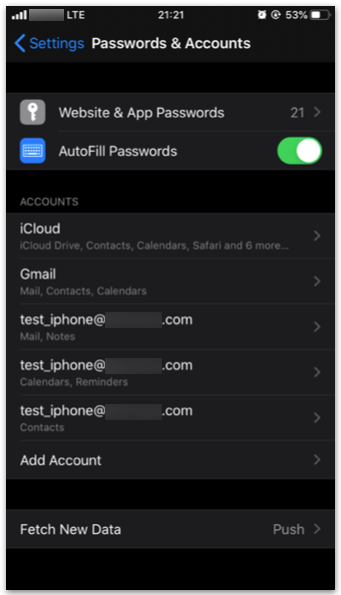
Your device is now ready. For additional settings, navigate to Settings > Accounts and select the account.
Priyanka Bhotika
Comments